How to change Discord's notification sound on Mac
Rich sound controls per event, but not per server or channel.
In Discord
Head to Settings → Notifications inside Discord — the sound options live there, and you can turn them off. That stops Discord's own audio, but macOS will still play its default sound on top — see the universal approach below to silence that too.
Universal approach — mute at the macOS level
macOS lets you silence any app's sound without disabling its notifications. The full visual walkthrough lives on the universal macOS method page. The short version:
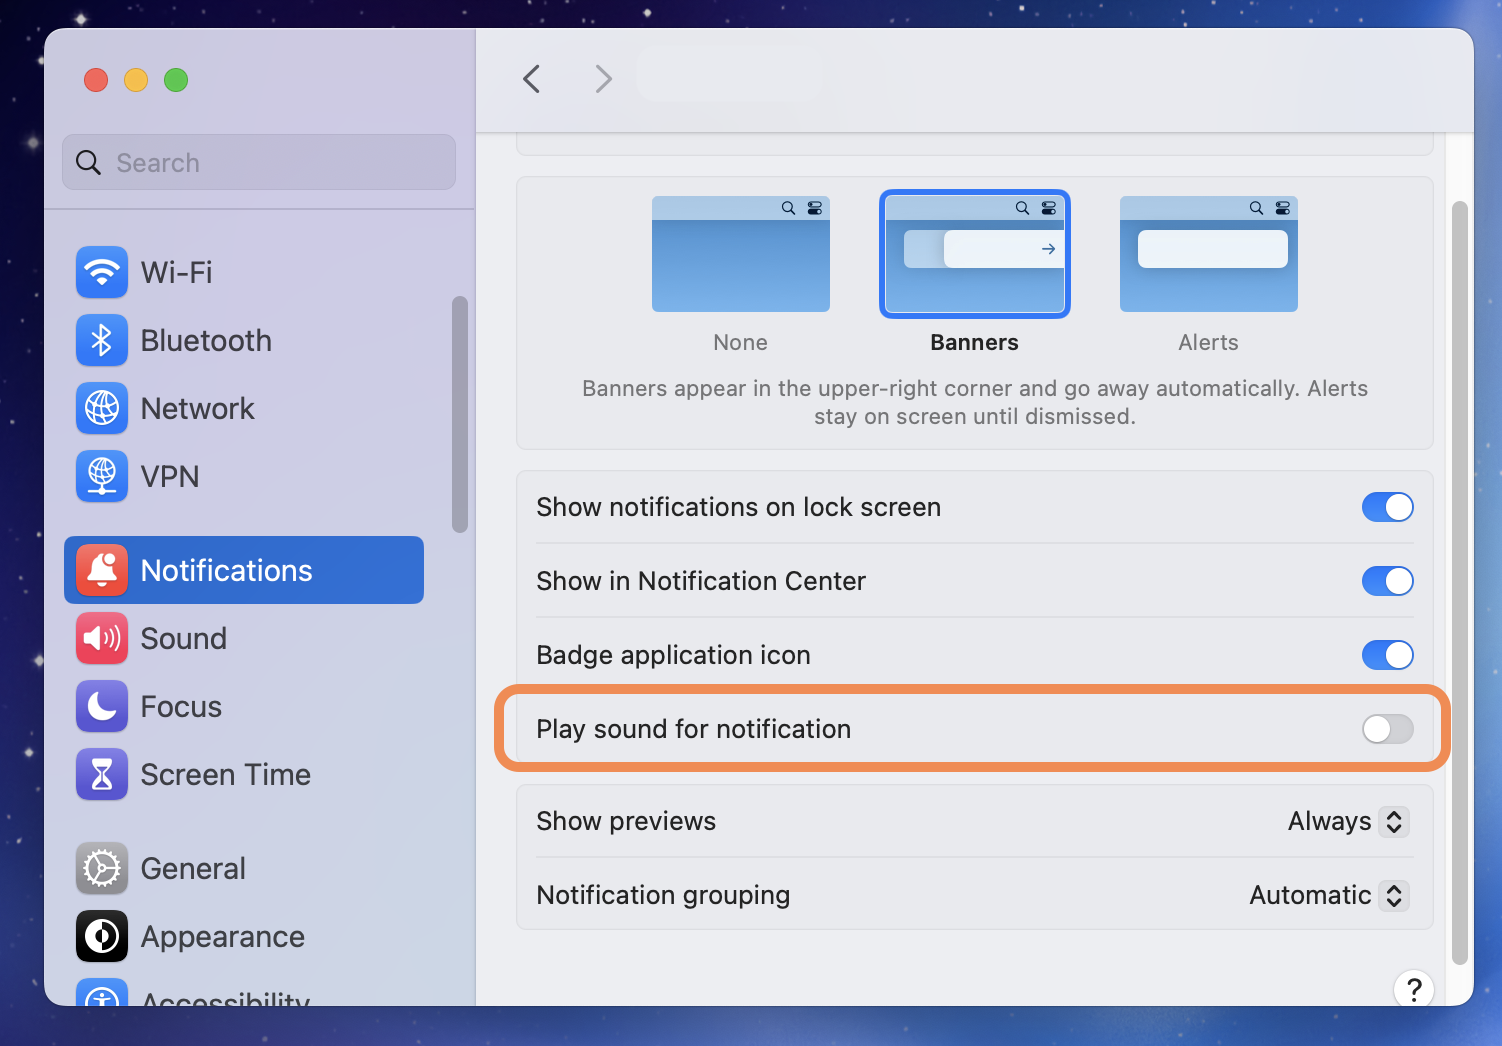
- Open System Settings → Notifications.
- Scroll to Discord in the application list and click it.
- Turn off Play sound for notifications.
- Discord keeps showing banners and badges — just no audio.
How Chirpy fills the gap
Chirpy reads the notification title and matches it against your rules. That means you can do things Discord can't on its own — different sounds per channel, per person, per keyword, per server. Three quick examples:
- Boss mentions only: a distinct chime when their name appears in any Discord notification.
- Urgent channel: a louder sound when the notification contains
#urgentor#critical. - Silence everything else: a rule that matches all other Discord notifications with no sound — banners still appear, your day stays quiet.
Want sounds that actually mean something?
Chirpy adds rule-based custom sounds on top of macOS notifications. One sound for Discord mentions, another for your calendar, silence for the rest.